Google

Tampilkan postingan dengan label Tutorial Photoshop. Tampilkan semua postingan

Edit Photo Online

XMG IMage

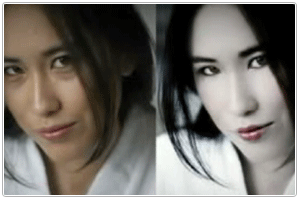
Editor gambar ini tidak hanya mentediakan editor foto online tetapi juga image hosting(tempat penyimpanan gambar online) yang mencakup crop, rotasi dan semua dasar-dasar lainnya, dan juga fitur-fitur bagus seperti image enhancement.

Phixr

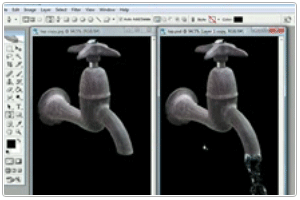
Aplikasi ini merupakan editor foto yang cukup bagus dengan kemiripan banyak fitur seperti photoshop bahkan lebih, seperti photoshop elements. Aplikasi ini memiliki beberapa filter bagus yang keren dan juga efek (efek pop art dapat melakukan beberapa hal menarik) dan mudah digunakan tentunya, selain itu anda bisa mengimpor gambar dari flickr, fotopic, photobucket, picasa, smugmug dan webshots dan juga dari berbagai url dan hard drive lokal.

Jika anda telah selesai mengeditnya, anda bisa menyimpannya pada format, JPG, PNG, PDF, GIF atau OCR (text recognition). Kemudian anda bisa meng-emailnya atau menguploadnya pada berbagai image hosting di atas dan juga buzznet, costco, dropshots, fotolog, imageshack atau live journal.

Pixenate

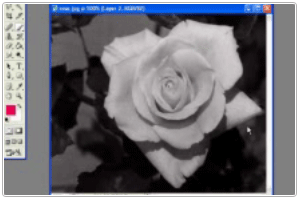
Aplikasi ini merupakan editor gambar untuk berbagai tujuan dan bisa anda gunakan untuk mengedit foto pada hard drive atau gambar yang telah ada. Pixenate ini memiliki fitur zooming, enhancing dan cropping, resizing, whitening, red eye, sepia dan banyak lagi. Anda bisa menguploadnya pada flickr atau menyimpannya pada local computer. Aplikasi ini sangat mudah digunakan dan praktis.

Pixer.us

Pixer ini memiliki berbagai fitur dasar yang anda harapkan dari editor foto online termasuk pengubah ukuran, rotasi gambar, cropping, pencahayaan dan ketajaman warna, saturasi warna dan lain sebagainya. Selain itu anda bisa menemukan efek warna seperti sepia, greyscale, invert dan lain sebagainya, juga special effect seperti “jitter”, “wood” dan “oil painting”.

Cellsea

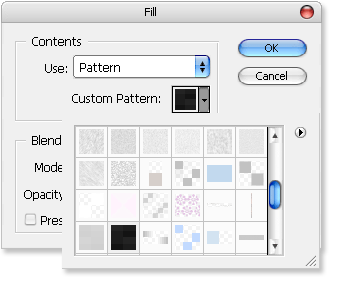
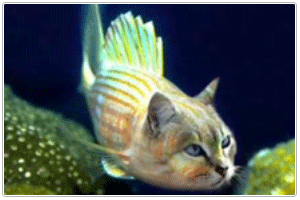
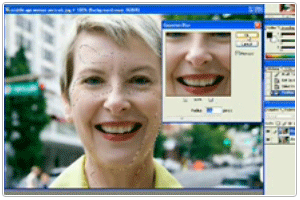
Editor foto online ini memiliki hampir semua dasar seperti rotasi, resize, crop dan lain sebagainya dan juga mengkoreksi defisiensi pada foto, mengubah foto menjadi lukisan cat, distort foto, dan efek blur professional. Anda bisa mengupload gambar dari PC, url gambar, halaman web atau dari google search, atau menggunakan sampel gambar yang telah disediakan. UI ini sangat user-friendly dan memiliki antarmuka yang sangat intuitif. Perlengkapan spesial efeknya bekerja sangat baik.

Graphita

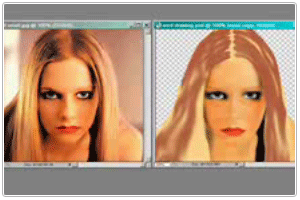
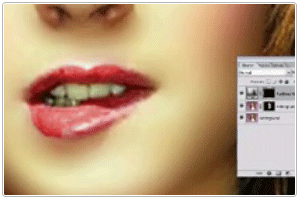
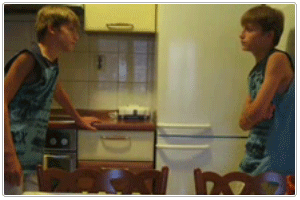
Graphita ini lebih dari hanya sekedar editor foto menarik, tetapi juga memiliki banyak kelebihan dibandingkan editor foto professional atau semi-professional, dengan banyak pilihan yang mudah dipahami dan digunakan.

Fauxto

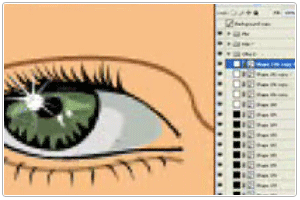
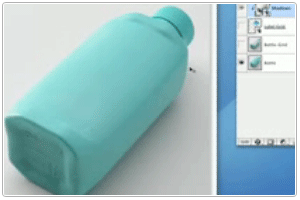
Editor foto online ini memilik antarmuka yang sangat mirip dengan photoshop.

Online Photo Tool

Disini anda bisa mengedit gambar yang diambil dari hard drive anda dan juga gambar-gambar lain yang ada di internet.

MyImager

Anda bisa mengupload gambar dari komputer anda atau dari manapun di web dan mengeditnya gratis dengan ratusan fitur dan filter yang tersedia.


SnipShot

Disini anda bisa mengedit foto dari hard drive, akun webshots atau flickr dalam satu tempat dan menyimpannya kembali pada tempat-tempat tersebut.

Picture2Life

Disini anda bisa mengedit gambar yang tersedia di internet atau hard disk anda, selain itu anda juga bisa mengimpor gambar dari situs sharing photo populer.

Preloadr

Editor foto dengan fungsi manipulasi gambar yang sangat bagus ini terhubung dengan akun flickr.

Picnik

Editor foto ini memiliki berbagai fitur menarik yang terhubung pada banyak situs penyimpanan foto.


Read More..


[get this widget]

Create a Polaroid Effect of your Photo

Polaroid in Photoshop

Photos are often much more interesting when they are displayed like a Polaroid photo. Learn how you can turn your normal photo into something livelier, by adding a realistic Polaroid effect to it.

Creating the Base

  1. Create a new blank canvas, say about 800×600 resolution, filled it with white [#ffffff] background.
  2. Draw a rectangular in the middle, using Rounded Rectangular Tool with Radius: 2px. This will be the base for your Polaroid photo.
  3. Double click on layer name to launch Blending Options, and insert these following effects:

    Drop Shadow

    • Opacity: 38%
    • Spread: 0%
    • Size: 5px

    Inner Shadow

    • Opacity:25%
    • Distance: 0px
    • Choke: 0%
    • Size: 57px

    Color Overlay

    • Color: White [#ffffff]
  4. Here’s how your output will look like.
    Polaroid in Photoshop

Determining Image Size within Polaroid

Let’s determine how big our image will be within a Polaroid.

  1. Hold CTRL and left click on the Polaroid Base’s Layer Thumbnail to highlight the selection.
  2. With the selection highlighted, click Select -> Modify -> Contract.
  3. Insert 7px and click OK, you will noticed that the selection is shrink by 7px.
  4. Select Retangular Marquee Tool, Hold ALT and drag a smaller rectangular on the bottom to minus it off the selection.
    Polaroid in Photoshop
  5. Create a new layer, call it " Photo Base" and fill the highlighted part with any color, say black, #000000 for instance. Hide the layer, we will use it as reference later.
    Polaroid in Photoshop

Adding Image into Polaroid

  1. Just make sure you have the selection of layer Photo Base still highlighted, if not, hold CTRL and click on the layer to re-highlight it.
  2. Create a new layer on top of Photo Base, call it Photo.
    Polaroid in Photoshop
  3. Look for your desired image, copy it and SHIFT + CTRL V to paste it. You will noticed the image will paste itself into the highlighted selection.
  4. Transform (CTRL T) or reposition until you are satisfied with the focus point.

Making Polaroid Image more Realistic

The photo looks a bit stiff to me at this stage. Lets tweak it so it looks that it looks more blending into the Polaroid.

  1. Double click on the "Golf" layer to call up the Blending Options and tweak the following styles:

    Inner Shadow

    • Opacity: 40%
    • Distance: 0px
    • Choke: 0%
    • Size: 46px

    Polaroid in Photoshop

  2. Hold CTRL, left click on Photo Base layer’s thumbnail to highlight the selection, create a new layer on most top, call it "Glossy"
    Polaroid in Photoshop
  3. Select Polygonal Lasso Tool, Hold ALT and draw a rectangular like the image below to cut off half of the highlighted selection.
    Polaroid in Photoshop
  4. Fill the left over selected area with white [#ffffff] and adjust its Opacity to 18% or any figures as long it looks comfortable on the photo. Your output will look something similar to the image below.
    Polaroid in Photoshop

Adding Text to Polaroid

The photo is almost done, add some writings. Fonts close to handwriting will be nice. Here’s my final output.

Polaroid in Photoshop


Read More..


[get this widget]

50+ Logo Design Tutorials

Logo Design

If you are going to design a logo and have running out of idea, check out this list of 50 Logo Design Tutorials compiled by elogodesign.com. It shows you how you can create different types of logos; from corporate logos to illustrative, futuristic, web 2.0, cartoons and more. It’s worth taking a look, who knows one of them might be just what you are looking for.

Here’s few more logo design related articles you might want to take a peek. 5 Free Fonts for Web 2.0 Logo, How Web 2.0 Logos are drawn (Photoshop)


Read More..


[get this widget]

Draw Transformers in Photoshop

transformers

Transformers the movie is by far the best movie ever created this year. Here’s something for the transformers fans - Creating Transformers and autobots & decepticons icons in Photoshop.

Downloading Transformers Fonts

Before getting started into the design, I surf around The Internet looking for similar Transformers fonts. Here is the closest I can get. Download this font and have them installed first.

1. Writing Transformers and Racterized it

Create a new canvas at your preferred size; I’m using 420×250px. Fill it up with black background, write “Transformers” with SF TransRobotics font downloaded just now and centralized it.

Right click on the text layer and select Rasterized type

2. Creating Similarities

Highlight the bottom of "T" and "F" with Maquee Tool, hold Alt and keep pressing Arrow down to increase the length of both these alphabets.

3. Metal-rized the font

Right click on layer’s Blending Options, and adjust the following style.

Inner Glow

Bevel and Emboss

Color Overlay

Color code: #31464F

Gradiant Overlay

Color Stop 1: #000000, Location: 0%

Color Stop 2: #90999d, Location: 100%

Pattern Overlay

4. A little Glow

Hold Ctrl, left click on the Transformer text’s layer thumbnail to highlight the selection. Create a new layer, select G radiant Tool and draw across from left to right as illustrated in the image above. Change the blend mode to Overlay and adjust Opacity to 50%. Your final product will look something like this.

5. Autobots and Decepticons

SF TransRobotics font’s "<" and ">" draws the logo for Autobots and Decepticons. What you need to do is copy the layer style from "Transformers" and paste it on the logos layers.

Expand the layer, and click on the eye of Gradient Overlay once to hide it. Your final Autobot and Decepticons logo will look something like this.


Read More..


[get this widget]

Create Carbon Fibre Pattern in Photoshop

I’m pretty sure you know what carbon fibres are. Here’s how you can create a carbon fibre pattern and use them in any designs, all with Photoshop.

1. Create Carbon Fibre

Create a new canvas with the size of 4×4 px, zoomed it to the max so you can easily fill the colors and insert the colors exactly like the color table below.

#242424
#1C1C1C
#1D1D1D
#151515
#1A1A1A
#222222
#131313
#1B1B1B

2. Define as Pattern

Click Edit -> Define Pattern and give it a pattern name. (Carbon Fibre for instance). Click OK to save it as a pattern.

3. Using Carbon Fibre Pattern

To test the carbon fibre pattern, create a new canvas with bigger size, 500×400px would be good. Click on Edit -> Fill (or Shift + F5), choose the carbon fibre pattern created just now, click OK and fill the section up. Here’s how your carbon fibre background should looks like:

Learn more about creating custom pattern with Photoshop.


Read More..


[get this widget]

Design Web 2.0 Label/Badges In Photoshop

Photoshop Web 2.0 Label

Lots of Web 2.0 websites like to use labels (or badges) like this to deliver status of current website/service, either the version or whether they are still in beta. Creating these labels are quite easy, especially with the use of Photoshop. Tutorial after jump.

Create a new canvas, 400 width 200 height. Select Custom Shape Tool, under Shape’s dropdown, select Seal and draw the shape in the middle of the page.

Photoshop Web 2.0 Label

Name the layer Star Label, launch Blending Options and insert these following style:

Drop Shadow

Photoshop Web 2.0 Label

Inner Shadow

Photoshop Web 2.0 Label

Bevel and Emboss

Photoshop Web 2.0 Label

Gradient Overlay

Photoshop Web 2.0 Label

Photoshop Web 2.0 Label

Color Stop 1: #0076b3, Location: 0%

Color Stop 2: #b3d5ff, Location: 100%

Create a new layer, select Horizontal Type Tool and insert any text. I’ll use the text Beta! here. Launch Blending Options, insert the following styles:

Photoshop Web 2.0 Label

Drop Shadow

Photoshop Web 2.0 Label

Gradient Overlay

Photoshop Web 2.0 Label

Photoshop Web 2.0 Label

Color Stop 1: #b2b9bc, Location: 0%

Color Stop 2: #ffffff, Location: 100%

Hold Ctrl, click layer thumbnail for layer Star Label to select its outline. Create new layer on the very top, name it Glossy.

Photoshop Web 2.0 Label

With outlines still selected, Select Polygonal Lasso Tool, hold Alt, and draw off half a circle as illustrated in the image below.

Photoshop Web 2.0 Label

Paint the remaining half with white, decrease the opacity until 15%, and here’s your final result.

Photoshop Web 2.0 Label


Read More..


[get this widget]

Powerful Photoshop: 30+ Mind Blowing Skills and Video Tutorials


Adobe Photoshop is perhaps one of the most important applications to handle graphics. It is not only an essential tool for webmasters and graphics designers but for photographers, artistes as well. Its capability is beyond imagination. Here’s some Photoshop drawing skills that will certainly blow your mind of.

How about viewing 3 YouTube video on a screen? If you came across any good Photoshop video suitable for the list, I’d like a heads up. Necessary credits will be given.

Speed Drawing and Make ups

Speed draw -Avril Lavigne

avril lavigne

Evolution Of A Model

evolution

Evolution Make Up

pb evolution

Turning Fat Thin

turn-fat-thin

Extreme Makeover

extreme makeover

Celebrity Makeover

celebrity makeover

Speed Vectoring

speed vector

Professionals At Work

professional at work

Dad’s Job

dads job

X-ray Through Clothes

xray

This is an adult content, so I’ll skip linking to it. Make sure you are at least 18 years old to view this video.

http://www.metacafe.com/watch/400249/photoshop_x-ray_trick_see_through_clothes/

Speed Drawing by Nico Di Mattia

sawyer kate scarlette johnson black spiderman alf radiohead thom yorke optimus prime bumblebee

Full Nico Di Mattia YouTube collection

2. Photoshop Video Tutorial

Using Photoshop Smart Object

photoshop smart object

Draw Realistic Tap Water Effect

realistic water

Color Black & White Image

color black white

Removing Wrinkles

remove wrinkles

Setting Your Name On Fire

name on fire

Clone Yourself

clone

Photo Restoration

photo restoration

Prototype Product Packaging

product packaging with photoshop

Photoshop.TV

photoshop tv

Tones of useful Photoshop tips and video tutorials brought to you live by these guys at Photoshop TV. View full list here at YouTube.

Sweet TV

sweet tv

Conducted by Mike McHugh, an Adobe Ambassador as well as Australia’s top Adobe Creative Suite Trainer, Creative Sweet Tv offers free Photoshop tutorials you will not want to miss.


Read More..


[get this widget]

Terimakasih telah mengunjungi Blog ini dan semoga bermanfaat

Artikel Terbaru

Mr. Bob sieck Twitter

http://www.makassarku.com/products_pictures/elektronik_logo_copy.gif

Electronic Rubric

Blogspot Tutorial